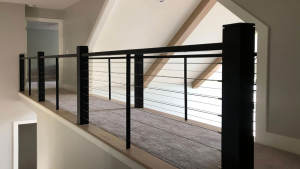
A Step-by-Step Guide to Installing a Perfect Cable Railing
Cable railings offer a stylish and contemporary option that provides both aesthetic appeal and functionality to your residential or commercial building. If you’re considering installing a cable railing, follow these step-by-step instructions to achieve a perfect installation.
Step 1: Measure and Plan
Before installing a cable railing, start by taking precise measurements and creating a plan for every part of the cable railing. Determine the desired length, height, and location of your railing. Ensure that your design complies with local building codes and safety standards.
Step 2: Prepare Materials and Tools
Make sure the necessary materials and tools are ready. Typically, the components required for installing a cable railing include railing posts, cables, connectors, end posts, and railing supports, among others. Then it is best to classify these components in advance, you need to know where each component needs to be installed.
 Step 3: Install Railing Posts
Mark the locations of your railing posts on the ground according to your plan. Use a drill to create holes in the ground and insert the railing posts. Ensure that the posts are vertically aligned and firmly secured to the ground.
Step 4: Install Cables and Connectors
Thread the cables through the connectors between the railing posts and end posts. The connectors typically include tensioners, connector plates, and nuts, among others. Follow the manufacturer’s instructions to install the connectors correctly and use wrenches and pliers to secure them firmly.
Step 5: Tighten the Cables
Use a tensioner to adjust the tension of the cables. Start by leaving some slack in the cables and gradually tighten them using the tensioner. Ensure that the cables are evenly tensioned across the entire railing and follow the manufacturer’s recommendations.
Step 6: Install the Railing Handrail
Install railing handrail supports and handrail tubes on the railing posts as needed to enhance the stability of the railing. Ensure that the supports are evenly distributed and properly installed.
Step 7: Test and Adjust
After completing the installation, carefully inspect the entire cable railing system. Ensure that all connectors are securely fastened, cables are appropriately tensioned, and the railing posts and end posts are vertically aligned. Make any necessary adjustments and fine-tuning to ensure safety and stability.
By following these step-by-step instructions, you can successfully install a perfect cable railing. Remember to prioritize safety and adhere to local building codes throughout the installation process. Enjoy the modern and elegant appeal that cable railings bring to your space.
Please note that these instructions are for general guidance, detailed installation instructions are required according to your cable railing. It’s essential to consult professional advice or the manufacturer’s guidelines for your cable railing system.

 +86 159 6420 9667
  sales@haxrailing.com


