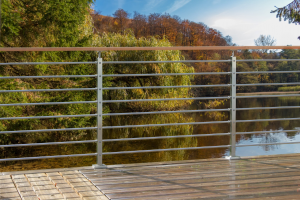
A Step-by-Step Guide to Installing Stainless Steel Bar Railings
Stainless steel bar railings are not only aesthetically pleasing but also durable and low-maintenance, making them an ideal choice for both residential and commercial spaces. Whether you’re upgrading your home’s interior or enhancing a commercial establishment, installing stainless steel bar railings can add a touch of elegance and modernity.
Step 1: Gather Tools and Materials
Before you begin, ensure you have all the necessary tools and materials on hand. You’ll need:
Railing components (posts, bars, brackets, handrail tube, etc.)
Auxiliary tool: Measuring tape
Screwdriver or drill
Screws or anchors
Pencil or chalk
Safety goggles and gloves
Pipe cutter (if necessary)
Step 2: Take Accurate Measurements
Measure the area where you intend to install the bar railings. Mark the positions for the posts and any necessary brackets. Keep in mind local building codes and regulations, as they may dictate specific requirements for railing height and spacing.
Step 3: Install Posts
Begin by installing the posts at the marked positions. Use a level to ensure they are perfectly vertical. If your posts will be mounted to the floor, use anchors or screws appropriate for your flooring type. For wall-mounted posts, ensure they are securely attached to the wall studs.
Step 4: Attach Brackets
Attach brackets to the posts to support the railing depending on your design. Ensure the brackets are level and properly aligned with each other. Double-check your measurements to avoid any inconsistencies.
Step 5: Cut and Install Bars
Measure the required length for each stainless steel bar and use a pipe cutter to cut them to size. Ensure the cuts are clean and straight. Slide the bars into the brackets and posts, making sure they are evenly spaced and level. If you’re using multiple bars for one section, use a level to ensure they are aligned.
Step 6: Secure the Bars
Once the bars are in place, secure them by tightening the screws on the brackets. Ensure the bars are firmly held in position and cannot be easily moved. Ensure the bars are firmly h
Step 7: Finishing Touches
Inspect the entire installation to ensure everything is level, secure, and aligned. Make any necessary adjustments before proceeding. Clean the stainless steel with a mild detergent to remove fingerprints or marks, then dry it thoroughly.
Step 8: Enjoy Your Newly Installed Stainless Steel Bar Railings
With the installation complete, step back and admire the sleek and modern look that stainless steel bar railings bring to your space. These railings not only enhance the aesthetics but also provide safety and stability.
Tips and Considerations:

Always wear safety goggles and gloves when working with tools and materials.
Measure twice and cut once to avoid costly mistakes.
Use a stud finder to locate wall studs for secure wall-mounted posts.
If you’re not confident in your DIY skills, consider hiring a professional for installation.
Regularly clean and maintain your stainless steel railings to keep them looking their best.
Installing stainless steel bar railings can transform your space’s look, adding style and function. By following this step-by-step guide, you can confidently undertake the installation process, ensuring accurate measurements, secure attachment, and a polished finish. Whether for your home or business, stainless steel bar railings offer a durable and attractive solution that will stand the test of time.

 +86 159 6420 9667
  sales@haxrailing.com


